前面介绍了Spring Boot的优点,然后介绍了如何快速创建Spring Boot 项目。不清楚的朋友可以看看之前的文章:https://www.cnblogs.com/zhangweizhong/category/1657780.html。
今天我们主要来看看 Thymeleaf 在 Spring Boot 中的整合!
这个系列课程的完整源码,也会提供给大家。大家关注我的微信公众号(架构师精进),回复:springboot源码 获取这个系列课程的完整源码。或者点此链接直接下载完整源码
Thymeleaf 简介
Spring Boot 2主要支持页面模板是 Thymeleaf 和 Freemarker ,当然,作为 Java 基本的页面模板 Jsp ,Spring Boot 也是支持的,只是使用比较麻烦。
Thymeleaf 作为新一代 Java 模板引擎,它的功能与 Velocity、FreeMarker 等传统 Java 模板引擎比较类似,但是Thymeleaf 模板后缀为 .html,可以直接被浏览器打开,因此,开发时非常方便。
它既可以让前端工程师在浏览器中直接打开查看样式,也可以让后端工程师结合真实数据查看显示效果,同时,SpringBoot 提供了 Thymeleaf 自动化配置解决方案,因此在 SpringBoot 中使用 Thymeleaf 非常方便。
事实上, Thymeleaf 除了展示基本的 HTML ,进行页面渲染之外,也可以作为一个 HTML 片段进行渲染,例如我们在做邮件发送时,可以使用 Thymeleaf 作为邮件发送模板。
整合Thymeleaf
新项目整合 Thymeleaf 非常容易,只需要创建项目时勾上 Thymeleaf 即可,这里就不说了。
下面说说怎么在现有的项目中手动整合Thymeleaf:
1、在pom.xml 增加依赖如下:
<!-- 引入 redis 依赖 --> <dependency> <groupId>org.springframework.boot</groupId> <artifactId>spring-boot-starter-data-redis</artifactId> <version>1.5.7.RELEASE</version> </dependency>2、application.properties 文件增加Thymeleaf 相关配置
########################################################### thymeleaf 模板###########################################################spring.thymeleaf.prefix=classpath:/templates/spring.thymeleaf.suffix=.htmlspring.thymeleaf.mode=HTMLspring.thymeleaf.encoding=UTF-8spring.thymeleaf.servlet.content-type=text/html 关闭缓存spring.thymeleaf.cache=falsespring.thymeleaf.prefix 指定模板页面的路径
3、增加前台页面
在resource\templates\thymeleaf 目录下增加index.html 页面
<html><head lang="en"> <meta charset="UTF-8" /> <title></title></head><body>Thymeleaf模板引擎<h1 th:text="${name}">hello Spring Boot~~~~~~~</h1></body></html>th:text 就是Thymeleaf的标签,用于处理标签体的文本内容。
注意:实际开发项目直接放resource\templates目录下就行,不需要加Thymeleaf 目录。我这里是有验证其他模板引擎框架,所以做了个目录区分。
其他更对的标签及用法,我会在下一篇文章中介绍。
4、创建 Controller
接下来我们就可以创建 Controller 了,实际上引入 Thymeleaf 依赖之后,我们可以不做任何配置。新建的ThymeleafController如下:
package com.weiz.controller;
import java.util.ArrayList;import java.util.Date;import java.util.List;
import org.springframework.stereotype.Controller;import org.springframework.ui.ModelMap;import org.springframework.web.bind.annotation.PostMapping;import org.springframework.web.bind.annotation.RequestMapping;
import com.weiz.pojo.User;
@Controller@RequestMapping("th")public class ThymeleafController {
@RequestMapping("/index") public String index(ModelMap map) { map.addAttribute("name", "thymeleaf-index"); return "thymeleaf/index"; }}在ThymeleafController 中返回逻辑视图名,逻辑视图名为 index ,意思我们需要在 resources/templates/t 目录下提供一个名为 hymeleafindex.html 的 Thymeleaf 模板文件。
注意:实际开发项目直接放resource\templates目录下就行,不需要加Thymeleaf 目录。我这里是有验证其他模板引擎框架,所以做了个目录区分。
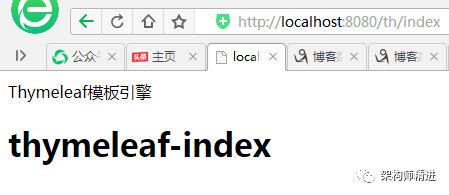
5、运行效果
在浏览器中输入:http://localhost:8080/th/index 查看页面返回结果。
总结
主要向大家简单介绍了 Spring Boot 整合 Thymeleaf,还是比较简单的。下一篇文章会给大家详细介绍Thymeleaf的常用标签和用法。大家也可以阅读 Thymeleaf 官方文档学习 Thymeleaf 的更多用法。
这个系列课程的完整源码,也会提供给大家。大家关注我的微信公众号(架构师精进),回复:springboot源码 获取这个系列课程的完整源码。
